How to Connect Yamaha Keyboard to Computer – Steps by Step Guide
No joy in the world can match the feeling of sharing your skills and the things you love. It is essential to have an interest in some activities that can help you relax and rejuvenate. And that’s the reason a lot of people like to play the keyboard. Learning and practicing tunes has become easier than it was, as now the keyboards can be connected to the computers for recording the songs and the entire playing session. However, people who want to record the new tune that they have practiced or composed often find it challenging to connect the Yamaha keyboard to the computer. The process is a bit tricky, but if appropriately learned, then it becomes a task of a mere 5 minutes. To help you through the process of connecting the keyboard to the computer, I will describe the process in detail with easy-to-follow steps.
How to Connect Yamaha Keyboard To Computer
Determine the ports on your keyboard
There are different types of ports on different keyboard models. Depending upon the type of port, the cables are connected between the keyboard and computer. Some Yamaha keyboards have both USB audio and MIDI ports, while others have USB MIDI port or a MIDI port. Some models of the keyboard also have an auxiliary port. The information about the ports is also mentioned in the keyboard’s manual so that you can connect the computer and PC.
Connect the keyboard to the computer
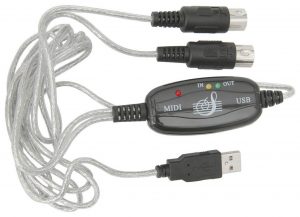 You can use a USB cable, MIDI cable, or an audio cable for connecting depending upon the port you are using for the connection. For MIDI ports, you will need a MIDI cable and USB cable that helps to transfer the MIDI data to the computer. For USB MIDI and USB audio and MIDI, you can connect USB cable A-to-B by using the free port on your PC and the port is given on your keyboard. Similarly, you can connect the MIDI cable to transfer the MIDI data. You will need USB cable along with other cables to connect the keyboard.
Download the MIDI drivers on your computer
Once you have connected your keyboard to the computer, switch on the keyboard. Some models also need to be put in PC or MIDI port depending upon the type of ports you use for connecting. Now for recording the tunes by using MIDI data, you will need to install MIDI drivers on your PC.
If you have a computer with Windows, then download the zip file of the drivers on Yahama’s official website and set up the drivers following the instructions.
Similarly, you can download drivers for your Macbook by downloading the drivers from the official Yamaha website.
Update the sound settings on your PC
The next step for connecting the keyboard is to change the audio setting on your computer so that the audio files can be recorded. For this, you have to go to the Settings- Sound Menu and click on the “Input” option. Select the option of keyboard or audio interface in this Input tab.
Set up a digital audio workstation
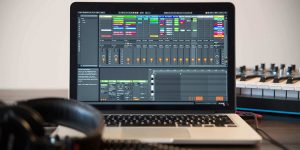 Here is the part where a lot of people get stuck. After connecting the keyboard, you need a digital audio workstation (DAW) for recording your audio files. Many interfaces come with their own DAW. If you are not able to find such a platform on your PC, then you can also free audio recording programs and tools that are available easily on the internet. Many people prefer using Audacity as their DAW, which is available for free trails. Reaper is also another great alternative for the same.
Record the music using a digital workstation
After installing the DAW on your computer, you can start recording the music. Find the option of “Track” on the Menu bar. The option of the Track might appear on the different tabs depending upon the type of DAW you are using. Click on the option of “New MIDI track” or “New audio file/track.” Start playing the keyboard for starting the recording. The DAW starts the recording of the sound produced from the keyboard. The MIDI records the sound volume and keys pressed for the tune. This recording is saved as an audio file. Click on the “Stop” button once you are done with recording. This way, you can record songs by connecting your keyboard to the computer.
Concluding Remarks
The process of connecting the keyboard to the computer is not that difficult, but one needs to know the procedure completely to do it with ease. Beginners can also seek help by watching online tutorials to connect the keyboard. Also, make sure to check the official website for Yamaha to find your model’s compatibility and other features. I hope this article helps you to connect the Yamaha keyboard to the computer.